The Complete Phone-Photography Guide for Real Estate Agents.
Eight chapters of field-tested craft. The lighting, the framing, the room-by-room shot lists, and the production workflow that turns phone photos into the listing images that sell.
8 chapters·45 min read·Updated May 2026·By A. Sanderson
Cover · 16:9 · real listing photography
Photograph — sample listingFrom a beta-customer listing · no stock imagery
By A. Sanderson
Written with input from working agents and the team building the tools they use.
Published 14 May 2026
01/08
Why listing photos matter — and what a good one actually does
~3 min read·Chapter 1 of 8
A good listing photo does one thing: it makes a buyer want to walk through the front door. Anything that gets in the way of that job — clutter, bad light, off-kilter framing — is the enemy. Every minute spent on photos is leveraged, because the photo carousel is where the buyer makes the first decision.
32%
Faster sale with pro-quality photos — Zillow research, cited 2023
(Full prose drafted in the content production phase. The chapter structure, headings, inline callout placement, and any stat pull-quote remain as wireframed here.)
A recent iPhone or Pixel will make MLS-grade listing photos in good conditions. It will fail predictably in low light, in wide rooms, and in high-contrast scenes — window glare, dim corners, north-facing winter exteriors. This chapter teaches the agent to read those conditions and know, on site, when the phone is enough.
(Full prose drafted in the content production phase. The chapter structure, headings, inline callout placement, and any stat pull-quote remain as wireframed here.)
If you read only one chapter of this guide, read this one. Light is the variable that separates a flat MLS-grade-C kitchen from one that makes a buyer click. The natural-light hierarchy: overcast morning, late afternoon, midday, evening. The cheapest upgrade in photography: turn on every single lamp.
(Full prose drafted in the content production phase. The chapter structure, headings, inline callout placement, and any stat pull-quote remain as wireframed here.)
If you’d rather not do this by hand
Some lighting failures are unrecoverable in-camera but fully fixable in post — blown windows, mixed colour temperature, the dim corner the camera couldn’t see. ListedRight handles selective exposure cleanup and disclosure tagging in one step. Try ListedRight free →
Composition for non-photographers. No art-school theory — just where to stand, how high to hold the phone, and what to put in the frame. The four rules: corners beat doorways, vertical lines stay vertical, foregrounds carry the photo, and when in doubt take two steps back.
48–54in
Recommended shooting height — chest level, not eye level
(Full prose drafted in the content production phase. The chapter structure, headings, inline callout placement, and any stat pull-quote remain as wireframed here.)
Out of the eight chapters, this is the one most agents will return to mid-shoot. It is a reference, not a read-through. Standalone shot lists for the five rooms that decide most listings — kitchen, bathroom, primary bedroom, living room, front exterior — with the specific angles, heights, and framing notes that separate a workable shot from a flat one.
Every room below assumes the lighting work from Chapter 3 is already done and the composition fundamentals from Chapter 4 are second nature. If a list says “three shots minimum,” treat that as the floor, not the ceiling — but cut ruthlessly in selection (Chapter 8). Forty-eight bedroom angles is not a listing; it is an editing problem.
Kitchen — three shots minimum
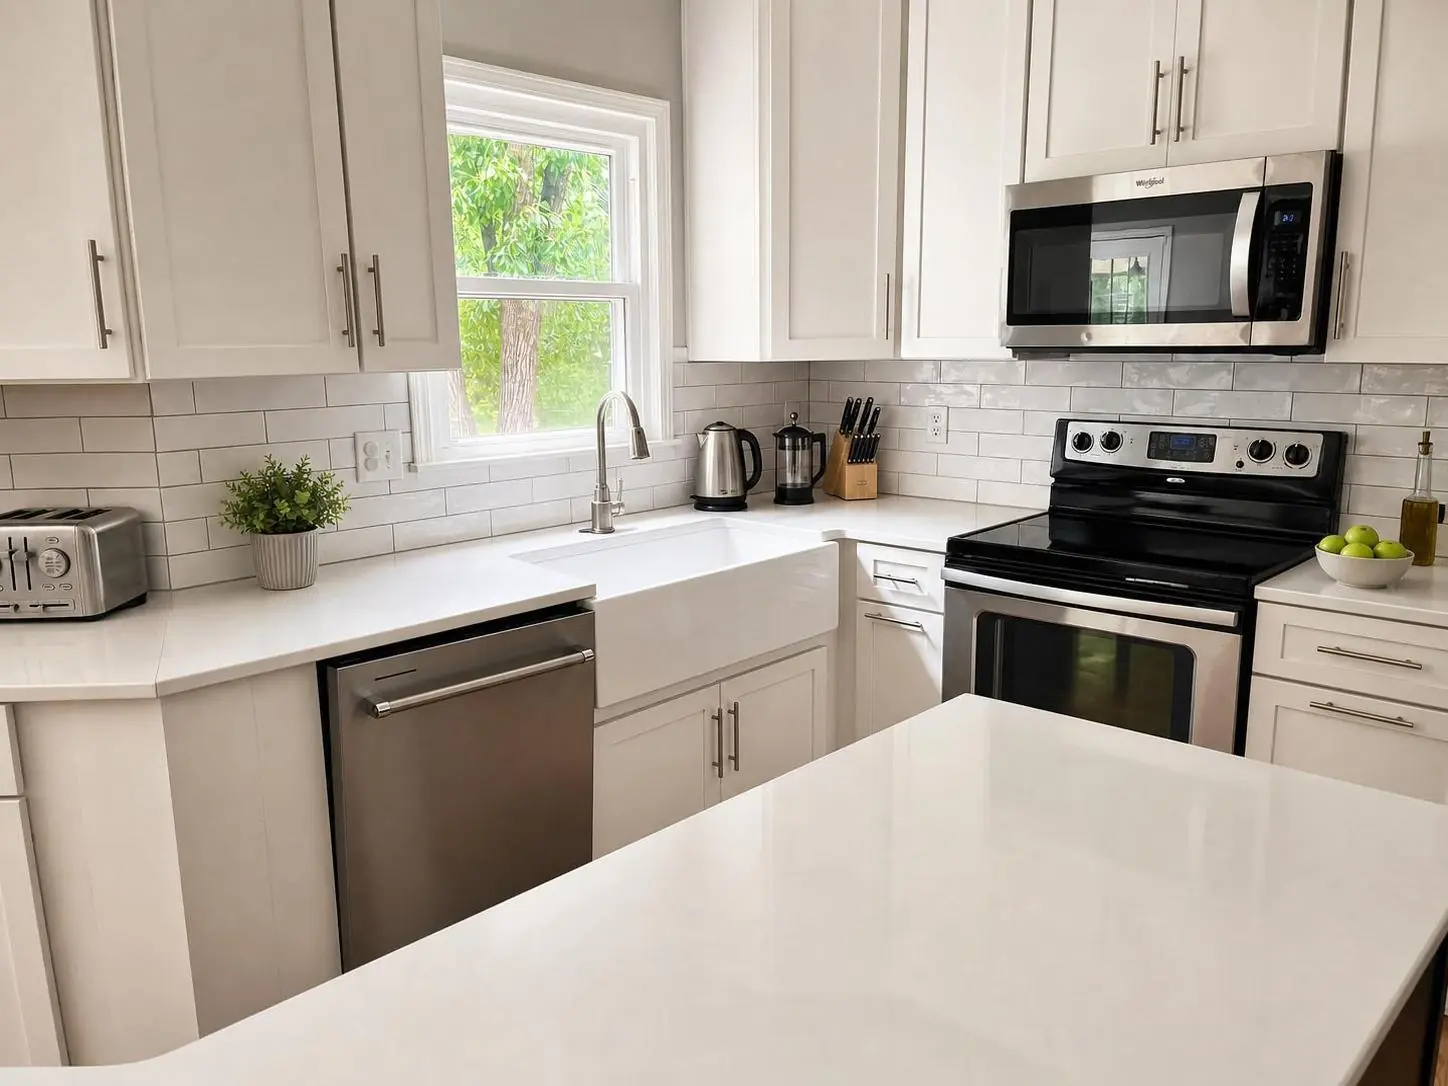
The kitchen is the room that converts. Open the curtains, turn on every overhead, every under-cabinet, every pendant. Clear the counters except for one intentional staging item — a wooden board, a single citrus bowl, a kettle. Photograph in this order:
The wide hero. From the corner opposite the main work zone, chest height, ultra-wide if the room is under twelve feet across. Vertical lines straight; phone-level on. The work zone (range, sink, island) sits in the lower third of the frame, the upper cabinets in the upper third, the floor as a foreground anchor.
The island or range detail. A three-quarter angle that shows the work zone without dominating it. The counter corner closest to camera is your foreground anchor — without one the photo reads as small and flat, no matter how good the kitchen is.
The connection shot. If the floor plan is open, photograph from the kitchen looking into the adjacent living or dining space. Sells flow without forcing the buyer to read the plan.
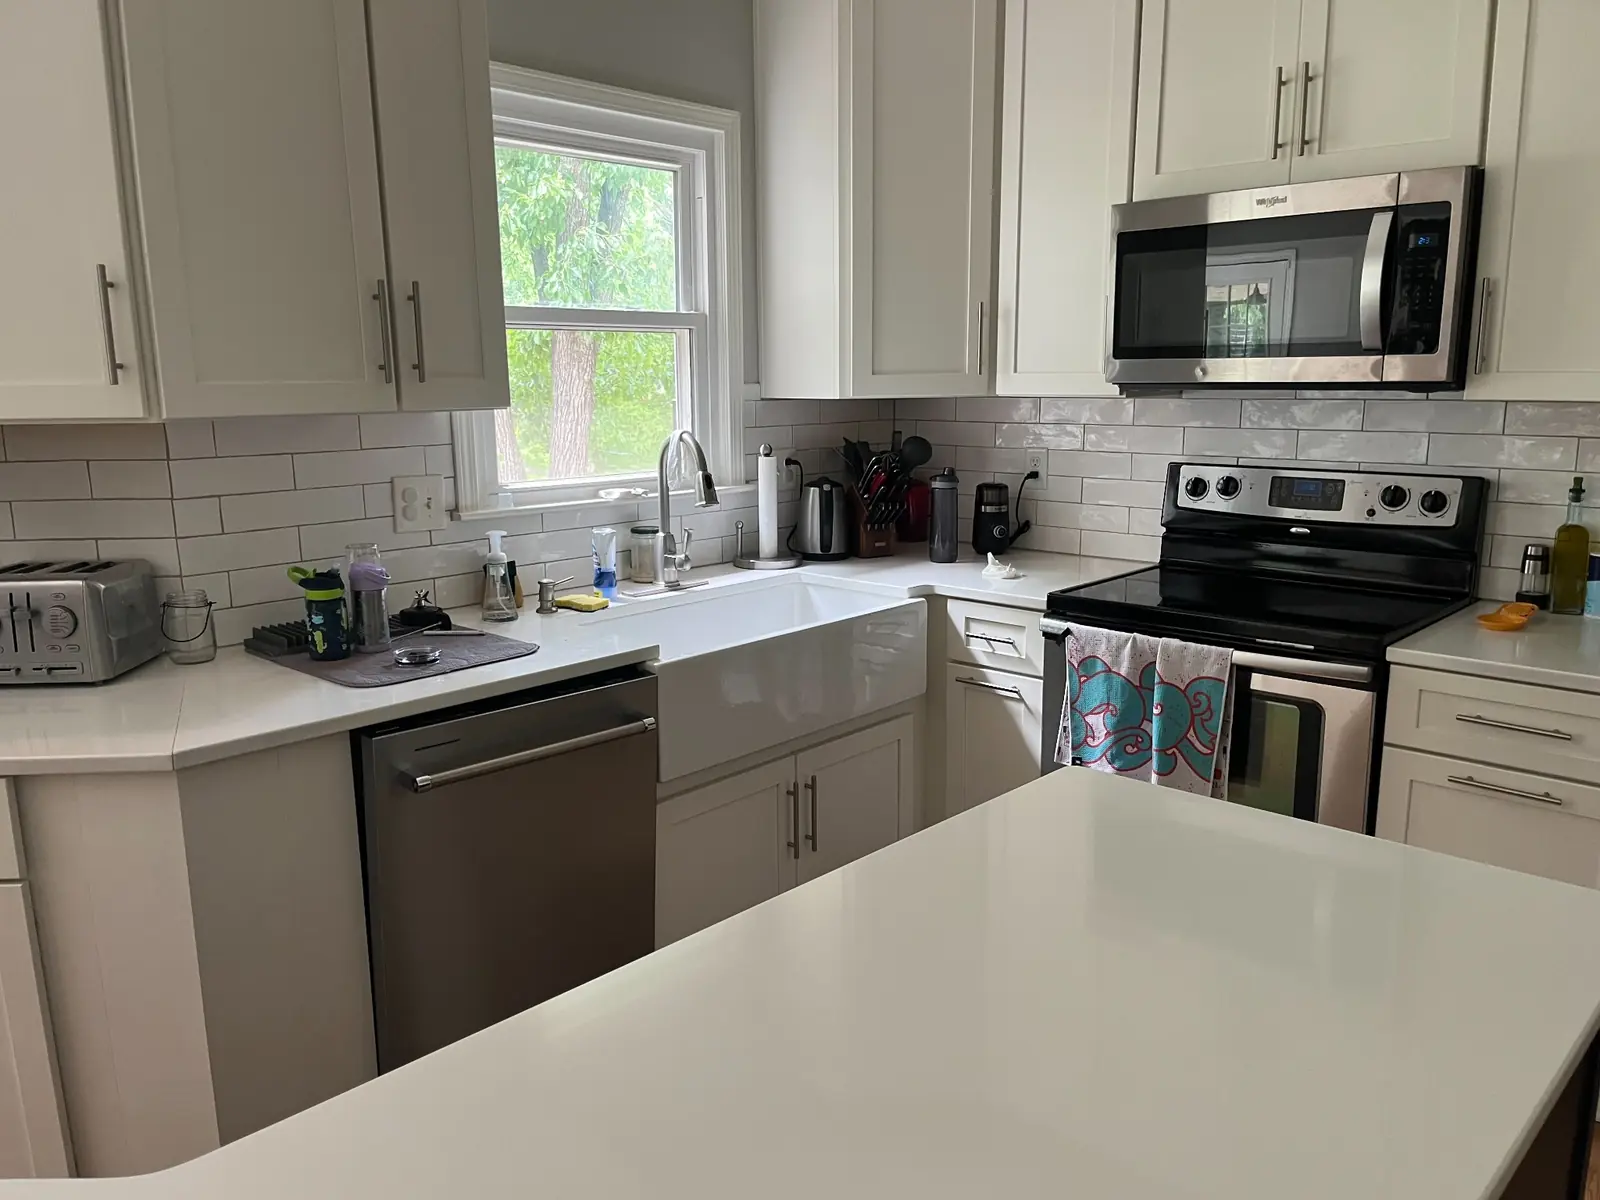
beforeafter
Before / after — kitchen wide hero. Same camera, same afternoon. Counters cleared, towel-rack noise removed, white balance corrected, one styled object on the counter.
Bathroom — two shots minimum
Bathrooms are where amateur listing photography fails most predictably. Two failures dominate: the photographer in the mirror, and an exposure metered for the white tile instead of the room.
Two shots: a wide that establishes the room (corner-to-corner, every light on, exposure locked on the tile rather than the window), and one tight detail — soaker tub, freestanding fixture, finish material. The detail shot is where premium materials earn their photo.
Primary bedroom — two shots minimum
The bed is the centre of gravity. Make it. Pillows fluffed, throw straight, no laundry baskets in the frame, no chargers on the bedside table.
Shoot one wide from a corner that includes the bed and the window light (exposure locked using the technique from Chapter 2 — tap-and-hold on a midtone, then recompose). Shoot one detail that captures the “hotel feel” — bench at the foot of the bed, framed art above the headboard, a single reading light on.
Living room — two to three shots
From the entry, wide, showing the room’s relationship to the rest of the floor plan. A mid-shot that includes the fireplace or feature wall. Optional: a tight styling moment if there is one worth a frame.
Front exterior — see Chapter 6
The exterior gets its own chapter because it carries its own weight. Cross-reference forward; do not try to shoot it as an afterthought after a full interior pass.
Exteriors: the photo that decides whether anyone clicks
~6 min read·Chapter 6 of 8
The front-of-house exterior is the first thumbnail on every listing site. It is the photo that decides whether the buyer clicks. Time of day, angle from the curb, the sky, and the things you can fix in ten minutes (trim, sweep, move the bins) decide the shot.
15–25ft
Curb stand-off for the three-quarter exterior — depth without distortion
(Full prose drafted in the content production phase. The chapter structure, headings, inline callout placement, and any stat pull-quote remain as wireframed here.)
If you’d rather not do this by hand
Overcast skies flatten exteriors. The honest options: reshoot in better light, or replace the sky in post — a legitimate, NAR-compliant edit when disclosed. ListedRight handles sky replacement and disclosure in one step. Try ListedRight free →
Warm-glow windows against a cool-blue sky. The signature exterior shot of every high-end listing. Historically required a photographer, a tripod, two trips to the property, and exposure-blending in Lightroom. There is now a second path — shoot in flat daylight, render to twilight in post, disclose the AI edit per NAR Articles 2 and 12.
(Full prose drafted in the content production phase. The chapter structure, headings, inline callout placement, and any stat pull-quote remain as wireframed here.)
If you’d rather not do this by hand
Day-to-twilight rendering with the NAR-compliant disclosure tag attached automatically — the strongest contextual fit for the product anywhere in the guide. Try ListedRight free →
From last shot to MLS-live: the production workflow
~6 min read·Chapter 8 of 8
The shoot is half the job. The other half is selecting, sequencing, lightly editing, and getting the photos onto the MLS before the listing goes stale. This chapter is the workflow piece — and the place the guide finally earns the right to make the product case.
15–25photos
The keeper count for most single-family listings — cut ruthlessly
(Full prose drafted in the content production phase. The chapter structure, headings, inline callout placement, and any stat pull-quote remain as wireframed here.)
If you’d rather not do this by hand
The 2-day-to-1-month gap between getting the listing and having photos on the MLS is the gap ListedRight exists to close. Better photos delivered faster — that is the wedge the rest of the guide has been building toward. Try ListedRight free →
When you’re ready
Bring the guide with you. Try ListedRight free.
Phone photos to market-ready listing images in 10 seconds. Twenty free when you sign up — no credit card.