The five-minute fix for flat exterior shots
The house is centred, the exposure is fine, the verticals are straight — and the shot still looks flat. Here are five fixes, none longer than a minute.

You’ve taken the photo. The house is centred. The exposure is fine. The vertical lines are straight. And the shot looks…flat. Lifeless. Like a thousand other listings. The house could be anywhere. The buyer scrolls past.
The fix takes five minutes and almost never requires going back another day. Here’s what to do.
Why “flat” happens
A flat exterior photo is almost always the result of one of three things:
1. The camera is dead-on to the front of the house. Both side walls are perfectly parallel to the camera. The result reads as a photograph of a facade, not a photograph of a home. There is no depth cue for the buyer’s eye to anchor on.
2. The horizon is in the middle of the frame. Equal parts sky and ground. The composition has no weight — nothing for the eye to land on first.
3. The light is overhead and the foreground is empty. Mid-day sun lands flat on the front of the house, the lawn is bare in front of the camera, and there is nothing in the frame closer than 30 feet.
You can fix all three in five minutes without leaving the curb.
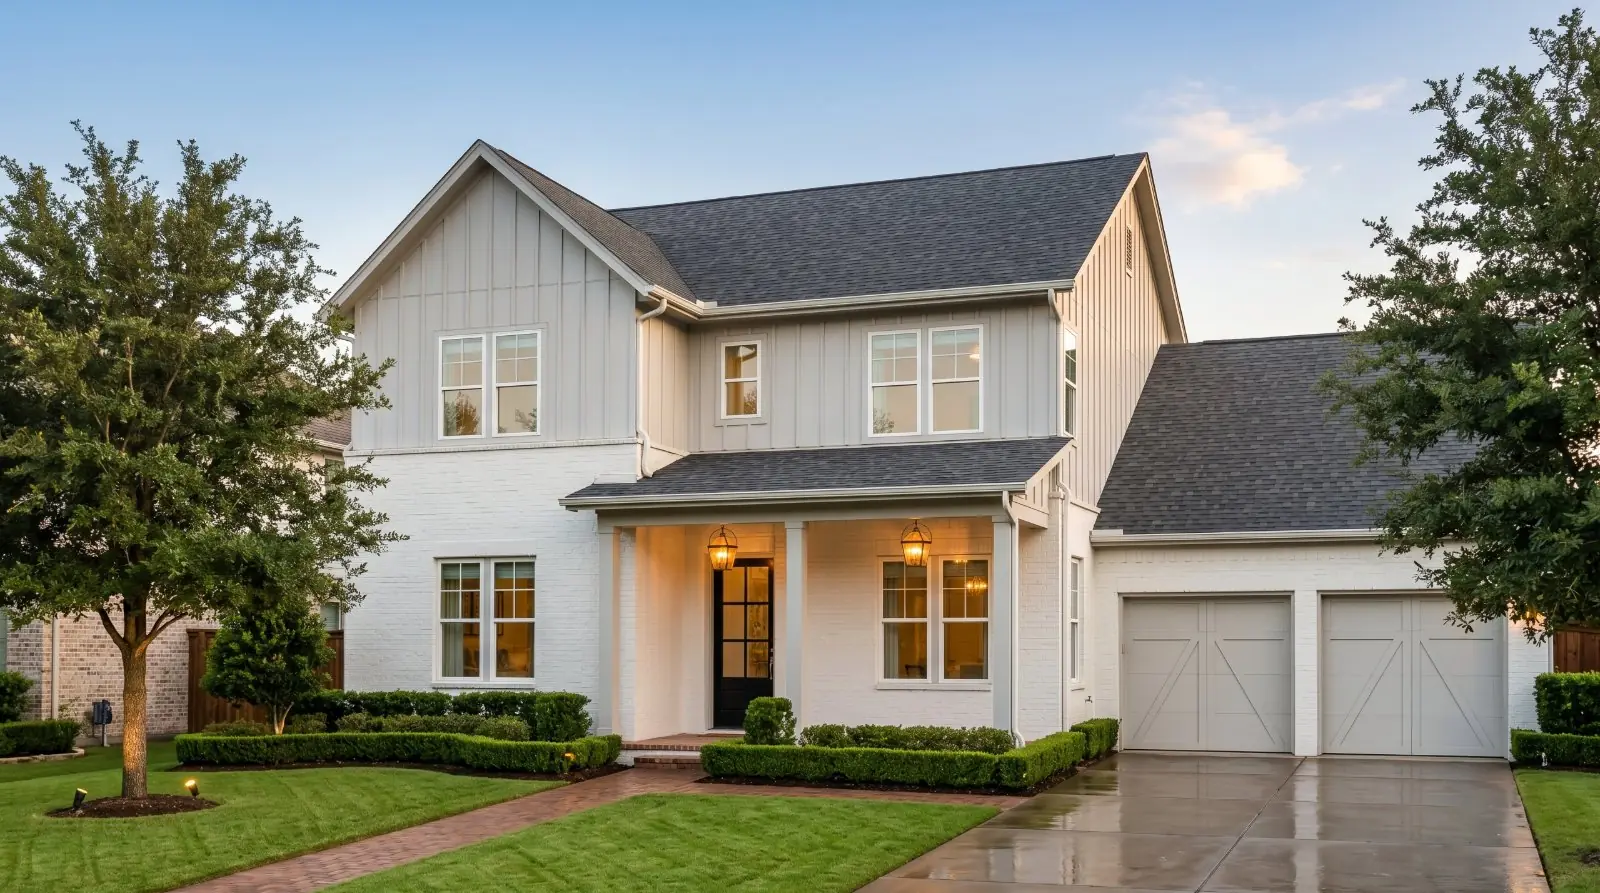
Fix 1 — Shoot the three-quarter angle, not the head-on
Move 10 to 15 feet off the centre line of the front door. Angle the camera so you can see the front of the house and one side wall in the same frame. Roughly two-thirds front, one-third side.
This is the single biggest “flat to dimensional” upgrade you can make. The side wall introduces a perspective line — windows, eaves, shadows running down the building — that anchors the house in three dimensions. Buyers read this as “real house,” not “photograph of a facade.”
The three-quarter angle is the default exterior shot for almost every real-estate photographer. The reason most agent-shot listings do not use it is that the centre-line shot feels more “symmetrical.” It is not what wins on the carousel.
Fix 2 — Drop the horizon to the lower third
The grid on your phone is doing this work for you. Frame the shot so the horizon line — the meeting point of ground and sky — sits on the lower third gridline, not the middle.
This puts the house in the upper two-thirds of the frame. The building has more visual weight. The composition reads as confident.
There are two exceptions. If the home is on a notable property — a long drive, a treed lot, a horse paddock, a beachfront — keep the horizon at the middle or upper third to let the property feature carry weight. For a standard suburban or in-town listing, drop the horizon.
Fix 3 — Add a foreground element
Even a small foreground element transforms a flat exterior. The eye reads it as depth.
The easiest options, in roughly this order:
- A border of shrubs or planted beds along the bottom of the frame. Most front yards have these. Frame so the bottom of the photo grazes the top of the planting.
- A path or driveway curve sweeping in from a lower corner. A walkway from the camera’s left foreground into the front porch is a stock real-estate composition for a reason.
- A tree branch or hanging foliage entering from the upper-right or upper-left. Backs the upper sky and adds depth.
- A planter, urn, or rocker on the front porch. Reads as “the home is loved.”
You do not need all four. One is enough. Sometimes a foreground element already exists and the agent did not compose to include it. Walk 10 feet to one side and check.
Fix 4 — Wait for the side light
If the photo is being shot mid-day and reads flat, the light is the variable. Move the shoot 30 to 60 minutes before sunset (or 30 to 60 minutes after sunrise in warmer months) and the same house will photograph dramatically dimensionally — without changing anything else about the shot.
Side light hits the front of the house and one side wall at the same time, in two different intensities. The shadow line down the side of the building is what your phone reads as depth. It is also what the buyer reads as “this house is somewhere with real light.”
If the listing schedule does not allow a return trip, the three-quarter angle and the lower-third horizon together get you most of the way there.
Fix 5 — Lift the shadow and the sky in editing
After the shoot, two small post-processing moves close the gap:
- Lift the shadow areas under eaves, on the side wall, and along the foreground planting. Most phone editors call this “shadows up” or “highlights up on dark areas.” A small lift (10–20%) prevents the side wall from going to murky grey.
- Pull the sky down slightly. If the sky is bright and blue, drop it half a stop. The sky reads richer. The house reads warmer by comparison.
Done with restraint, neither of these is the kind of edit that changes what the property looks like — they are tonal corrections, the same kind a film camera makes automatically. The California disclosure law and the Wisconsin disclosure law (effective 2027) both explicitly exclude basic edits of this type from their definitions of “alteration.” See Sky replacement and the NAR disclosure question for the line between tonal correction and sky replacement.
The short version
Move off the centre line. Drop the horizon. Find a foreground element. Wait for side light if you can. Lift the shadow, pull the sky. Five fixes, none requiring more than five minutes total at the shoot or at the desk. The same house, photographed by the same agent, will read as a different listing once these five are in.
Sources
- NAR — 2024 Profile of Home Buyers and Sellers Highlights
- California Business and Professions Code § 10140.8 (AB 723) — for the editing-versus-alteration distinction: leginfo.legislature.ca.gov
Same house. A different listing.
Phone photos to market-ready listing images in 10 seconds. Twenty free when you sign up — no credit card.
One photo tip every Sunday.
Real techniques agents are using this week. No spam. Unsubscribe in one click.