Why bathroom photos always look smaller than the bathroom — and how to fix it
The mirror problem, the ultra-wide trap, and the two shots that make even a small bathroom read as a space worth seeing.
Bathrooms are the room most agents shoot worst. There are three reasons, all fixable.
First, the room is small, the phone is wide, and the wide-angle distortion stretches every edge in the frame. Second, there’s a mirror in nearly every bathroom, and most amateur bathroom photos have the photographer in them. Third, bathrooms are usually shot in the same flat overhead lighting they’re used in — which is fine for brushing your teeth and terrible for the camera.
The room punches above its square footage for one specific reason:
A bathroom photograph isn’t just a documentation shot. It’s the visual answer to a question the buyer is actively asking about the property — does this house have the bathroom features I need? — and a wrong or missing answer ends the click. The bathroom photo’s job is to communicate, in a single frame, the features the buyer is shopping for.
The editorial standard to keep in mind throughout: think hotel bathroom, not homeowner bathroom. Not too personal, not too staged, not too sterile, absolutely not messy. The bathroom should look ready for the next person, not occupied by the current one. And it should be cleaner in the photo than any other room in the listing — buyers judge bathrooms on cleanliness more harshly than any other space because the room is intimate by nature. A flaw forgiven in a kitchen reads as neglect in a bathroom.
This article covers the two shots a bathroom needs, the angle that keeps the photographer out of the mirror, the toilet treatment that separates competent listings from amateur ones, and the small adjustments that make a 40-square-foot bathroom photograph like a 60-square-foot bathroom.
The mirror problem
In a small bathroom, you cannot stand somewhere that doesn’t put you in the mirror. Or rather: you can, but only if you understand the geometry.
The rule: the angle of incidence equals the angle of reflection. The mirror reflects whatever is in the line of sight at the same angle the camera is shooting it from. If you stand directly in front of the mirror, the camera sees you. If you stand off to one side and shoot the vanity at a three-quarter angle, the mirror reflects the room across from it, not you.
The practical move:
- Stand in the corner of the bathroom that puts you at roughly a 30–45 degree angle to the mirror — not straight on, not from directly beside it.
- Frame the shot so the vanity is the foreground and the mirror reflects part of the bathroom that isn’t behind you (the tub, the shower, the opposite wall).
- Check the reflection in the phone screen before you press the shutter. If you can see yourself, take one step further toward the corner.
This single technique — shooting bathrooms at an angle, not head-on — eliminates 90% of amateur bathroom-photo mistakes.
The two shots every bathroom needs
For primary bathrooms in most listings, two shots is plenty. Three only if the bathroom has a strong feature worth a third frame (a freestanding tub in a window-lit alcove, a steam shower, a separate water closet that adds to the perception of size).
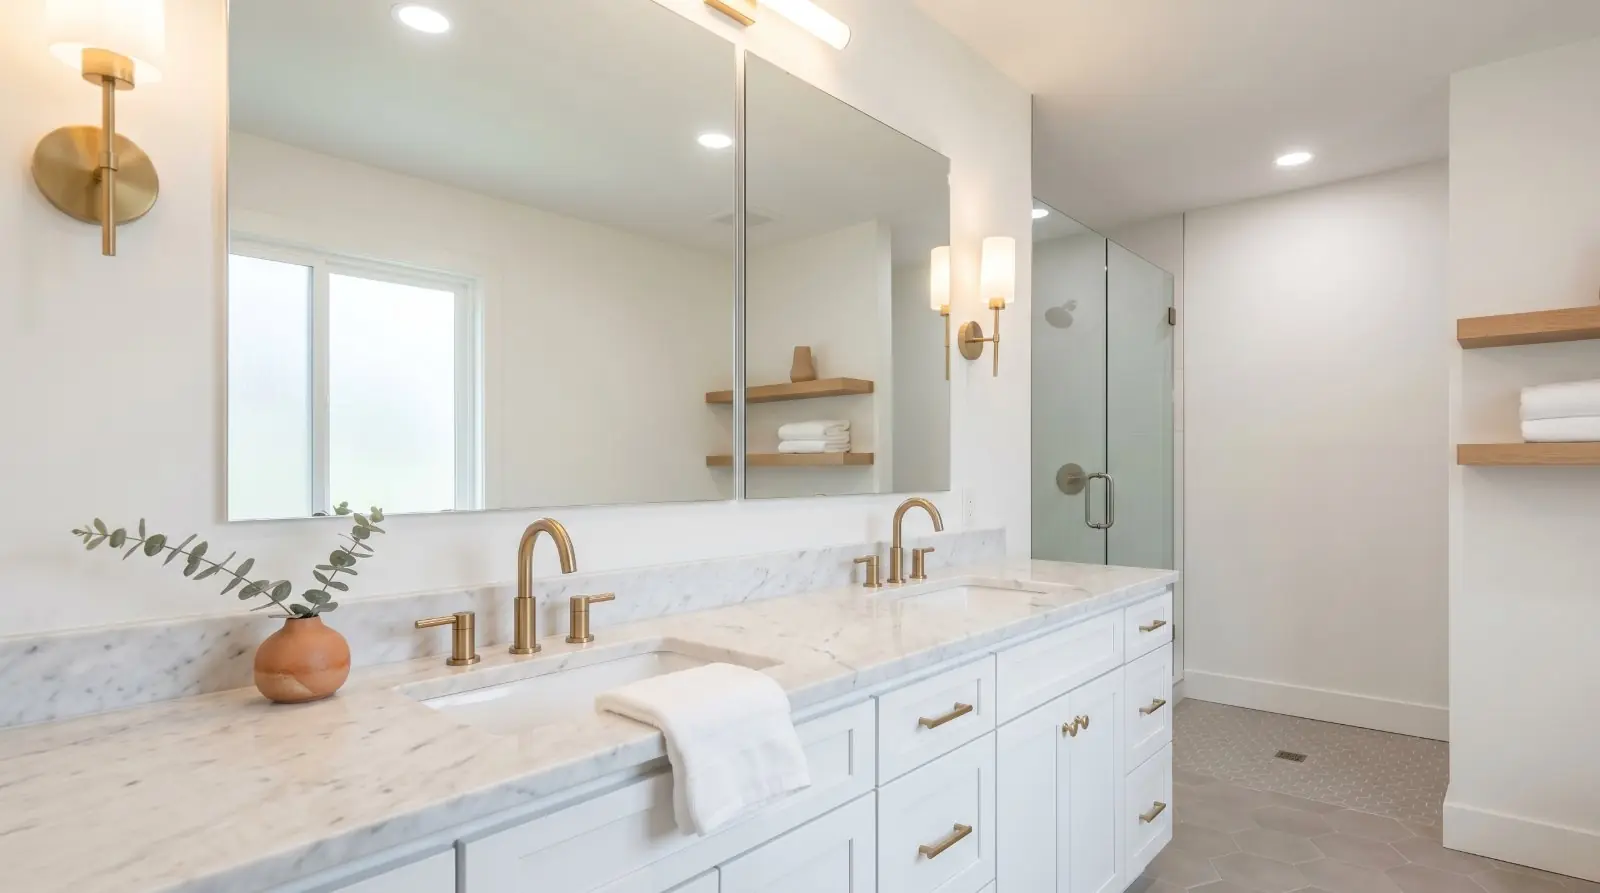
Shot 1 — The wide vanity-and-room shot
The main shot. Stand in the corner farthest from the vanity, shoot at the three-quarter angle described above. Chest height. Phone wide but not ultra-wide.
The frame should include: the vanity in the foreground, the mirror reflecting the room across from you, and as much of the rest of the bathroom as the wide angle can capture without distortion (the tub or shower in the background, the floor, a section of the opposite wall).
The wide shot should answer five questions in a single frame:
- Is there a tub, a shower, or both?
- Is the vanity single or double?
- Is there visible storage?
- Is there natural light?
- Does the bathroom feel cramped or comfortable?
If the wide shot can’t answer those questions clearly, the framing is wrong. Try a different corner or move further from the vanity.
Every light on — the vanity lights, the overhead, any sconces. Bathroom lights tend to be cool-white LEDs that read blue on camera. Turning on every light isn’t about brightness here, it’s about evenness. A bathroom shot with only the overhead on has hard shadows under the vanity and under the eyes of anyone in the mirror reflection.
Shot 2 — The feature shot
The closer shot that anchors the bathroom in its strongest feature. The freestanding tub. The walk-in shower. A double vanity with strong styling.
Stand off-angle to whatever feature you’re shooting. A freestanding tub photographed straight on reads as a magazine product page. The same tub photographed at a three-quarter angle — with light coming from the window and one styling element (a folded towel, a wooden bath stool, a small plant) — reads as a room.
The feature shot is the one where you can be a little more aggressive about styling. Bathrooms read better with one or two intentional objects than with nothing. Just don’t overdo it. A single rolled towel on the edge of the tub. A small candle on the vanity. Not a Pottery Barn catalogue.
The ultra-wide trap
Every recent iPhone and Pixel has an ultra-wide setting — 0.5× on iPhone, a similar wide mode on Pixel. The temptation in a small bathroom is to use it. Don’t. Not as the default.
Ultra-wide lenses on phones produce noticeable distortion at the edges of the frame. In a small bathroom, that distortion stretches the vanity, bows the floor, and bends the lines of the tile. The room looks larger in the photo than in real life, which is exactly the problem: the buyer arrives at the showing and feels the bathroom is smaller than the photos suggested. That’s the failure mode every listing-photo standard guards against.
Use the standard 1× lens. If the bathroom is genuinely small and the standard lens can’t capture enough of the room in one frame, take two or three medium shots instead of forcing the wide angle to do work it can’t do honestly.
Light, white balance, and the cool-blue problem
Bathroom fixtures are usually cool-white LEDs in the 4000–5000K range. The camera’s auto white balance tries to neutralise them and often overshoots, producing a photo that looks slightly blue or grey instead of clean white.
Two fixes:
- Tap to focus and lock exposure on a neutral surface. A white towel, a white tile, the vanity counter if it’s white marble. The phone uses that area as the reference for white balance and the rest of the photo follows.
- Add a warm-toned styling object. A wooden bath stool, a brass-handled tray, a small plant in a terracotta pot. The warm tone fights the cool light and gives the camera something to balance against.
If the bathroom has a window, open the blind. Natural light in a bathroom is the single biggest improvement you can make. Even diffused overcast daylight is warmer and more flattering than every fluorescent the room has.
Dry every surface before you shoot
A bathroom with wet surfaces photographs as a bathroom that hasn’t been cleaned. The eye can’t always tell the difference between water and grime in a still image, and the assumption defaults to grime.
Before the shutter clicks:
- — Dry the sink basin and the rim. Water beads on a polished surface read as soap scum.
- — Dry the faucet. Water spots on chrome are the single most common giveaway of an amateur bathroom photo.
- — Dry the shower glass. Streaks, water spots, and the leftover film from yesterday’s shower all photograph harshly.
- — Dry the tub floor and the tub ledge. A wet ring around the drain reads as residue.
- — Dry the floor around the toilet base. Any darkness here reads as urine to the buyer’s eye.
- — Wipe condensation off the mirror. Even a slight haze flattens the reflection and signals “recently used.”
- — Dry the countertop. Any water rings from where the toothbrush cup was sitting.
A microfibre cloth and 90 seconds of work fixes all of this. It’s the single highest-leverage prep step in bathroom photography.
The toilet — necessary, never the hero
The toilet is in every bathroom photograph and it’s the single most common thing that ruins one. Most amateur bathroom photos either lead with the toilet, leave the lid open, or compose the wide shot in a way that puts the toilet front-and-centre. All three are mistakes.
The hierarchy a bathroom photo should establish, in roughly this order:
- Vanity and mirror
- Lighting
- Tub or shower
- Storage
- Toilet
The toilet appears in the frame only to communicate the layout. It’s never the visual anchor of the shot.
The standards every toilet shot needs to meet:
- — The lid is closed. Always. There is no exception. An open-lid toilet in a listing photo is the single fastest way to make the bathroom read as careless.
- — The seat is aligned straight. A crooked seat reads as the same kind of carelessness as an open lid.
- — The base is clean. Dust, hair, and stains around the toilet base are the hardest part of the bathroom to clean and the part the camera notices most.
- — The toilet brush, the plunger, and the trash can are removed from the frame. Move them to a closet or under the sink for the shoot.
- — A single fresh roll of toilet paper on the holder. Not three rolls stacked on the tank. Not the half-used roll from yesterday.
- — The tank top is clear. No decorative items, no tissue boxes, no air fresheners.
For cramped layouts
If the toilet is squeezed into a small space — directly facing the doorway, jammed against the tub, awkwardly close to the vanity — don’t make it the lead shot. Compose the wide shot from an angle that puts the vanity in the foreground and the toilet incidental, even if that means a tighter or less wide composition.
Private water closets
In primary bathrooms, the toilet is sometimes housed in its own private compartment — a small enclosed space with a door, separating the toilet from the rest of the bathroom. This is a feature buyers actively look for, and the numbers say so plainly:
If the listing has one, it can earn its own photo. Shoot the private water closet only if it is: genuinely large enough to feel comfortable, not cramped; clean and bright; useful for explaining the bathroom’s layout. If the water closet is just a dark cubicle with a toilet in it, don’t dedicate a photo to it. Mention it in the listing description and let the imagination work.
A related NAHB finding worth keeping in mind: 76% of buyers rate a linen closet in the primary bath as essential or desirable. If the bathroom has one, include it in the wide shot or capture it as a small dedicated detail when the storage is genuinely a feature.
What to leave out
Occupied versus vacant bathrooms
Occupied bathrooms need aggressive depersonalization. The seller lives there; the photo doesn’t include that fact. Everything on the above leave-out list goes. The seller may resist — these are personal items they use every day — but the photo’s job overrides the daily-living convenience. A clear vanity in the photo is worth a temporarily inconvenient morning routine for the seller.
Vacant bathrooms have the opposite problem. They read as cold and abandoned without light staging. One folded white towel on the bar. One small plant or eucalyptus stem in a clear vase. A single simple soap dispenser on the vanity. Nothing else. The vacant bathroom needs to suggest someone could live here, not that someone has just moved out.
For vacant listings where the seller can’t provide any staging items, a tighter shot focused on the vanity and mirror often outperforms a wider shot that reveals the empty room.
What to capture when the bathroom has it
What earns a slot in the gallery as a detail or feature shot, when the bathroom has it:
- — A freestanding tub. Three-quarter angle, fill spout visible, ideally with window light from one side and a small bath tray as the only styling.
- — A frameless walk-in shower. Shot from outside the shower at a slight angle (not straight on, to avoid camera reflection), glass meticulously dry and clean, tile lit evenly.
- — A double vanity. Symmetrical composition — both sides staged the same. Don’t leave one side cluttered and one clean.
- — A wet room. Wide enough to show the waterproof zone, the tub-shower relationship, and the drainage. The floor must be dry. Zillow’s 2024 analysis of more than two million listings found that listings mentioning a wet room sold for 3.3% more than expected. Treat it as a hero feature when the listing has one.
- — A private water closet (treated above).
- — A premium shower feature — rain head, handheld sprayer, integrated bench seating, shower niche with thoughtful storage, zero-threshold entry. Tight detail shots, every fixture polished.
- — Stone slab tile or walls. Detail shot of the slab, lit evenly so the natural patterning reads as quality rather than as veining the camera couldn’t handle.
- — Premium hardware (brass, matte black, polished nickel) — included as part of the wider vanity or shower shots, rarely worth a dedicated close-up unless the hardware is genuinely a selling feature.
- — Heated floors. Not actually visible in a photo, but if the listing description mentions them, the bathroom photo can still signal “quality finish” through how the floor reads.
Each one earns a slot only if it’s a genuine selling feature. A standard tub-shower combo doesn’t earn a detail shot. A standout freestanding tub in a primary bathroom does.
Matching the styling to the listing tier
Bathroom styling, like kitchen styling, has to slot into the buyer’s price-band expectations. Over-styling a starter bathroom reads as overselling; under-styling a luxury bathroom reads as cheap. For context on how seriously sellers’ agents take the room:
Nearly half the agents in the market are actively staging the bathroom before the listing photos go up. If you’re not — at minimum, with the cleanup work in this article — your bathroom photos are competing against staged ones.
Powder rooms and starter bathrooms (typically under $400K listings)
The job: communicate clean, functional, well-maintained. Not aspirational. Aim for 1–2 photos per bathroom. One folded white towel, one simple soap dispenser. That’s the styling budget. Don’t fight the bathroom. If it’s a builder-grade bathroom from 2012, photograph it as a clean and well-maintained builder-grade bathroom from 2012. For a powder room, a single framed piece of neutral art can warm the room without crossing into staged.
Standard full bathrooms ($400K–$1M)
Aim for 2–3 photos per bathroom: wide shot, one feature shot (vanity or shower), one detail if there’s something worth showing. The recommendations throughout this article apply unmodified.
Primary bathrooms in mid-market listings
Aim for 3–4 photos: wide layout shot, vanity (especially if double), tub or shower, optional feature shot. Slightly more styling than secondary bathrooms — a folded white towel on each side of a double vanity, a small plant on the counter, a rolled towel near the tub.
Luxury bathrooms ($1M+, definitively at $1.5M+)
Aim for 4–6 photos for a primary bathroom that’s a major selling point. Wide hero, vanity, tub, walk-in shower, private water closet if it’s a feature, and 1–2 detail shots of premium finishes. More styling than mid-market, but still restrained. A bath tray on a freestanding tub. Fresh rolled towels in open shelving. A single candle (unburnt) on the counter. Neutral art on the walls. Greenery in moderation. Lighting matters more, not less. Mixed colour temperature kills a luxury bathroom photo faster than any other factor. Twilight or evening-mood shots can work for primary bathrooms with strong window views, integrated lighting, and sufficient privacy — but the daytime shot remains the gallery anchor.
Small bathroom, big-bathroom photo
A 40-square-foot guest bathroom can be photographed in a way that doesn’t apologise for the size. The principles:
- — Shoot at the three-quarter angle. Show depth.
- — Use the standard lens. Resist ultra-wide.
- — Light evenly. Every fixture on. Natural light if possible.
- — Style minimally. One object that reads as intentional.
- — Tight shots are honest. Two medium shots that show the vanity and the shower clearly tell the buyer more than one distorted wide-angle shot.
The buyer wants to know the bathroom is clean, functional, and well-maintained. It’s not the job of the photo to make a small bathroom look like a primary suite. It’s the job of the photo to make a small bathroom look like a well-kept small bathroom — which is what the buyer is actually buying.
The before-and-after


Cleaner bathroom photos, in 10 seconds per shot.
Phone photos to market-ready listing images in 10 seconds. Twenty free when you sign up — no credit card.
One photo tip every Sunday.
Real techniques agents are using this week. No spam. Unsubscribe in one click.


